Power Up Smart: How to Operate and Maintain Your Ryobi 6500W Generator
When the lights go out or you need reliable power at a remote job site, your Ryobi 6500W generator can be a true lifesaver. But like any powerful tool, getting the most out of it—and doing so safely—hinges on understanding how to operate and maintain your Ryobi 6500W generator correctly. This isn't just about turning it on; it’s about responsible power generation that keeps you, your family, and your equipment safe while ensuring your investment lasts for years.
This guide cuts through the technical jargon to give you practical, actionable steps for everything from its first start-up to long-term storage. We'll cover the essentials, highlight critical safety points, and equip you with the knowledge to keep your Ryobi humming.
At a Glance: Your Ryobi 6500W Generator Essentials
- Fuel First: Only use fresh unleaded gasoline with up to 10% ethanol. NEVER use E15 or E85 fuel—it's illegal and will destroy your generator.
- Read Your Manual: Seriously, before anything else, understand the safety rules and operating procedures. It’s your ultimate reference.
- Safety Zone: Always operate outdoors in a well-ventilated area, far from windows and doors, to prevent carbon monoxide poisoning.
- Initial Setup: Unpack, install wheels and handle, add engine oil, and check fuel.
- Starting Up: Follow a clear sequence: fuel valve, choke, engine switch, then pull the recoil starter or use electric start.
- Power On: Connect appliances only after the generator is running smoothly. Never overload it.
- Maintenance Matters: Regular oil changes, air filter cleaning, and spark plug checks are key to longevity.
- Storage Savvy: Prepare your generator properly for extended periods of inactivity to avoid issues.
- Bonded Neutral: Understand that your generator's neutral is bonded to the frame, which impacts certain transfer switch setups.
Beyond the Box: Why Understanding Your Generator Matters
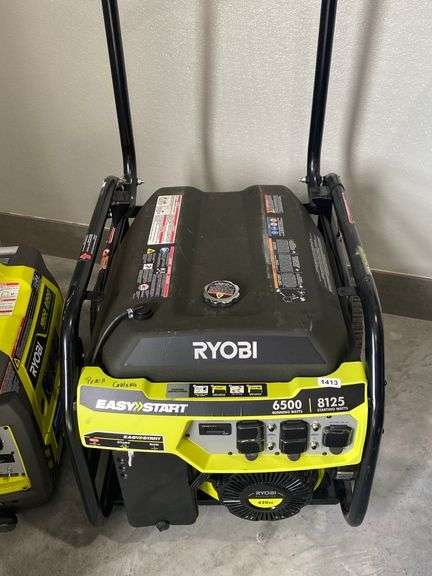
Generators like your Ryobi RY906500VNM (or RY906500) 6,500 Watt model are robust machines designed to deliver significant power. But their very nature—combustion, high voltage, and moving parts—demands respect and careful handling. Skimping on the initial setup or neglecting routine maintenance isn't just inconvenient; it can lead to dangerous situations, costly repairs, or even void your warranty.
Think of your generator as a small, portable power plant. Just like a professional power grid operator, you need to follow protocols to ensure safety and efficiency. This guide distills the most important information from the Ryobi 6500 watt generator guide and other expert sources to empower you with that knowledge.
Getting Started: Unboxing and First Steps
Before you even think about adding fuel, take a moment to understand your generator. The Ryobi 6500W comes with key features, electrical specifications, and an assembly process designed to get you up and running.
Assembly: More Than Just Wheels
Your generator won't come out of the box ready to power your home. Key assembly steps typically include:
- Wheel and Handle Installation: These make moving the hefty unit much easier. Follow the instructions precisely to ensure they are securely fastened.
- Adding Engine Oil: This is perhaps the most critical step after unboxing. Generators are typically shipped without engine oil. Locate the oil fill cap/dipstick, ensure the generator is on a level surface, and fill with the recommended type and amount of oil (usually 10W-30 or SAE 30, consult your manual for specifics). Never overfill. A low oil sensor will prevent the engine from starting or running if the level is too low, but insufficient oil can cause catastrophic engine damage.
- Fueling Up: Wait on this until you're ready to start, but understand the requirements now.
Fueling Your Powerhouse: The Golden Rule
This is a non-negotiable safety and warranty point:
- ONLY use fresh, unleaded gasoline containing up to 10% ethanol (E10).
- DO NOT use E15 or E85 fuel. Using these fuels is a violation of federal law, will cause severe damage to the engine, and will absolutely void your warranty. Ethanol percentages higher than 10% can corrode fuel lines, carburetors, and other components not designed for such concentrations.
Always use a clean, approved fuel container and a funnel to prevent spills. Store gasoline in a cool, dry place away from heat sources and open flames.
Critical Safety Instructions: A Must-Read Primer
Your Ryobi operator's manual dedicates several pages (usually 3-4) to important safety instructions and specific safety rules. These aren't suggestions; they are mandates to prevent serious injury or death.
Here are the absolute essentials:
- Carbon Monoxide (CO) Hazard: Generators produce carbon monoxide, an odorless, colorless, deadly gas. ALWAYS operate your generator OUTDOORS in a well-ventilated area, far from windows, doors, and vents that could allow CO to enter your home or other enclosed spaces. Never run it in a garage, even with the door open.
- Electrical Safety:
- NEVER operate the generator in wet conditions. Keep it dry and protected from rain and snow.
- Avoid overloading the generator. Understand its wattage limits and the starting/running watts of your appliances.
- Grounding: Ensure your generator is properly grounded as per local codes and the manual. Your Ryobi generator's neutral is bonded to the frame, which is an important electrical design consideration, especially when connecting to a home's electrical system via a transfer switch. Always consult a qualified electrician for home hook-ups.
- Extension Cords: Use only heavy-duty, outdoor-rated extension cords that are properly rated for the power load and distance. Inspect cords for damage before each use.
- Fire Hazard: Fuel is highly flammable.
- Never refuel a hot or running engine. Always shut down the generator and allow it to cool before adding fuel.
- Do not smoke near the generator or fuel.
- Clean up any fuel spills immediately.
- Hot Surfaces: Engine components become extremely hot during operation. Allow the generator to cool before touching or servicing.
- Moving Parts: Keep hands, feet, and clothing away from moving parts during operation.
- Children and Pets: Keep them away from the generator area at all times.
The single most important safety rule: Read and understand your operator’s manual before using this product. It contains specific warnings and instructions unique to your model. Save it for future reference!
Powering Up: Operating Your Ryobi 6500W Generator
Once assembled, filled with oil, and you've absorbed the safety warnings, it's time to bring your generator to life.
Pre-Start Checklist
Before every start-up:
- Generator Placement: Ensure it's outdoors, at least 20 feet from any building openings, on a stable, level surface.
- Check Oil Level: Verify the oil is at the proper level.
- Check Fuel Level: Ensure you have enough fresh, E10 or less gasoline.
- Confirm Connections: Ensure all electrical loads are disconnected from the generator outlets.
- Inspect: Look for any loose parts, damage, or fuel leaks.
Starting the Engine (Step-by-Step)
Most Ryobi 6500W generators offer both a recoil (pull) start and an electric start. The sequence is similar:
- Fuel Valve (On/Open): Locate the fuel valve (often a small lever or knob) and turn it to the "ON" or "OPEN" position. This allows fuel to flow from the tank to the carburetor.
- Engine Switch (ON/RUN): Flip the main engine switch (sometimes labeled "ON" or "RUN") to its operating position.
- Choke Lever (CHOKE): If the engine is cold, move the choke lever to the "CHOKE" position. The choke restricts airflow, enriching the fuel mixture for easier cold starts. As the engine warms, you'll move it to "RUN."
- Starting Method:
- Recoil Start: Grip the starter handle firmly and pull it slowly until you feel resistance. Then, pull rapidly and fully in one smooth motion. Repeat if necessary until the engine fires.
- Electric Start: Insert the key (if applicable) and turn it to the "START" position, or press the electric start button. Hold for a few seconds until the engine starts. Do not crank for more than 5 seconds at a time; allow the starter to cool for 10 seconds between attempts.
- Choke Adjustment: Once the engine starts and runs for a few seconds, gradually move the choke lever to the "RUN" or "OPEN" position. If the engine sputters or dies, move it back to choke slightly and then slowly open it again as the engine warms up.
- Warm-up: Allow the generator to run for a few minutes without any load to stabilize.
Connecting Electrical Loads
With the generator running smoothly:
- Plug in Appliances: Connect your desired appliances or extension cords to the generator's outlets.
- Monitor Load: Pay attention to the generator's behavior. If it struggles, sputters, or the circuit breaker trips, you may be overloading it.
- Never Backfeed: Under no circumstances should you ever attempt to connect your generator directly to your home's main electrical panel without a professionally installed transfer switch. This dangerous practice, known as "backfeeding," can send electricity back into the utility lines, risking electrocution for utility workers and others.
Shutting Down Your Generator
Proper shutdown is just as important as proper startup:
- Disconnect Loads: First, disconnect all appliances and extension cords from the generator outlets. Allow the generator to run for a few minutes with no load to cool down.
- Engine Switch (OFF): Turn the engine switch to the "OFF" position.
- Fuel Valve (OFF/CLOSED): Turn the fuel valve to the "OFF" or "CLOSED" position. This prevents fuel from flowing and helps to prevent carburetor issues during storage.
Keeping It Running: Essential Maintenance for Your Ryobi 6500W
Regular maintenance is the secret to a long, reliable life for your generator. Your Ryobi manual details a maintenance schedule (typically on pages 15-17), and adhering to it is crucial.
The Maintenance Schedule: Your Generator's Check-Up
Here's a general guide, but always refer to your specific Ryobi 6500W manual for exact intervals:
- Before Each Use:
- Check engine oil level.
- Inspect air filter.
- Check for loose hardware or damage.
- Inspect electrical cords.
- Every 25 Hours or Annually (whichever comes first):
- Change Engine Oil: This is critical after the first 25 hours (break-in period) and then regularly. Dirty oil is the enemy of any engine.
- Check spark plug condition.
- Clean air filter.
- Inspect fuel filter (if accessible).
- Every 50 Hours or Annually:
- Inspect fuel lines and connections.
- Clean cooling fins.
- Every 100 Hours or Annually:
- Replace spark plug.
- Inspect/adjust valve clearance (often a job for a service center).
- Clean spark arrester.
Key Maintenance Tasks Explained
1. Changing the Engine Oil
- Frequency: First change at 25 hours, then every 50-100 hours or annually.
- Process:
- Run the generator for a few minutes to warm the oil, allowing it to drain more easily.
- Shut down the generator and disconnect the spark plug wire to prevent accidental starts.
- Place a drain pan beneath the oil drain plug.
- Remove the oil fill cap/dipstick and then the oil drain plug.
- Allow all the old oil to drain completely.
- Reinstall the drain plug securely.
- Refill with the recommended type and amount of new engine oil.
- Check the oil level using the dipstick, ensuring it's not overfilled.
- Reattach the spark plug wire.
- Disposal: Dispose of used oil responsibly at an authorized recycling center.
2. Cleaning/Replacing the Air Filter
- Frequency: Check before each use, clean every 25 hours, replace annually or as needed.
- Process:
- Locate the air filter housing, usually a plastic cover held by clips or screws.
- Remove the cover and take out the foam or paper filter element.
- Foam filters: Wash in warm, soapy water, rinse thoroughly, and allow to air dry completely. Lightly coat with clean engine oil, then squeeze out excess.
- Paper filters: Tap out loose dirt. If heavily soiled, replace it. Do not wash paper filters.
- Reinstall the clean filter and cover.
3. Inspecting/Replacing the Spark Plug
- Frequency: Inspect every 25 hours, replace annually or every 100 hours.
- Process:
- Remove the spark plug boot.
- Use a spark plug wrench to remove the spark plug.
- Inspect: Look for signs of wear, fouling, or carbon buildup. A light brown or grayish deposit is normal. Black, oily deposits indicate issues.
- Gap: Check the electrode gap using a feeler gauge. Adjust if necessary (check your manual for the correct gap).
- Install a new spark plug (or cleaned existing one) by hand to avoid cross-threading, then tighten with a wrench (do not overtighten).
- Reattach the spark plug boot.
4. Cleaning the Spark Arrester
- Frequency: Every 100 hours or annually.
- Process: The spark arrester is a small screen inside the muffler that prevents hot particles from escaping.
- Allow the generator to cool completely.
- Locate and remove the screws holding the muffler end cap.
- Carefully pull out the spark arrester screen.
- Use a wire brush to remove carbon deposits from the screen.
- Reinstall the screen and muffler end cap.
Long-Term Storage: Putting Your Ryobi to Bed
If you plan to store your generator for more than 30 days, proper preparation is key to prevent fuel degradation and other issues.
- Fuel Stabilization:
- Add a quality fuel stabilizer to the fuel tank.
- Run the generator for about 10-15 minutes to ensure the treated fuel circulates throughout the fuel system and carburetor.
- Drain Fuel (Optional but Recommended for Longer Storage): If storing for several months, completely drain the fuel tank and carburetor bowl. Run the engine until it stops from lack of fuel. This prevents stale fuel from gumming up the carburetor.
- Change Oil: Perform an oil change before storage to ensure fresh, clean oil is protecting internal engine components.
- Remove Spark Plug: Remove the spark plug and pour about a teaspoon of clean engine oil into the cylinder. Gently pull the recoil cord a few times to distribute the oil, then reinstall the spark plug. This "mists" the cylinder wall to prevent rust.
- Clean: Clean the exterior of the generator, removing any dirt or debris.
- Cover: Store in a clean, dry location, preferably covered, to protect it from dust and moisture.
Troubleshooting Common Ryobi 6500W Generator Issues
Even with proper maintenance, generators can sometimes be temperamental. Your manual includes a troubleshooting section (page 18) with solutions for common problems. Here are a few typical scenarios:
- Engine Won't Start:
- Is there fuel? Is the fuel valve open?
- Is the oil level correct? (Low oil sensor might prevent starting).
- Is the engine switch "ON"?
- Is the choke set correctly for a cold engine?
- Is the spark plug clean and properly gapped? Is the spark plug wire securely attached?
- Is there fresh fuel? Stale fuel is a common culprit.
- Engine Starts, Then Dies:
- Did you move the choke to "RUN" too quickly?
- Is the fuel tank vent open (if applicable)?
- Is the fuel filter clogged?
- Is there enough fuel?
- No Power Output:
- Is the circuit breaker tripped? Reset it.
- Are the electrical connections secure?
- Is the generator overloaded? Try disconnecting some devices.
- Is the generator producing power but not at the outlets? This could indicate an internal electrical fault (time for a service center).
- Engine Runs Rough/Sputters:
- Dirty air filter.
- Stale or incorrect fuel.
- Fouled spark plug.
- Clogged carburetor (especially if fuel was left in for extended periods).
For persistent issues or problems beyond basic troubleshooting, it’s always best to consult an authorized Ryobi service center. Attempting complex repairs without proper knowledge and tools can be dangerous and costly.
Understanding Your Generator's Electrical Design: Bonded Neutral
You might have noticed the warning: "The neutral is bonded to the frame of the generator." This isn't just a technical detail; it's a critical safety feature and a key factor in how your generator interacts with external electrical systems.
- What it Means: In your Ryobi 6500W generator, the neutral conductor of the electrical output is physically connected to the metal frame of the generator. The frame itself is connected to a ground rod (if properly set up).
- Why it Matters (Safety): This bonding creates a single point of ground, ensuring that if there's an electrical fault (like a hot wire touching the frame), the circuit breaker will trip, preventing electrocution. It's essentially creating a safe path for fault currents.
- Why it Matters (Application):
- Stand-alone operation: For basic, plug-and-play use with extension cords, this design is generally safe and typical for portable generators.
- Connection to home electrical system: If you plan to connect your generator to your home's electrical panel via a transfer switch, this bonded neutral feature becomes very important. Many transfer switches and residential electrical systems are designed for "non-bonded" neutral sources (like utility power). When a bonded generator is connected to a transfer switch that also bonds the neutral, it can create undesirable "multiple neutral-to-ground bonds," which can violate electrical codes and potentially interfere with ground fault circuit interrupters (GFCIs) or cause other issues.
- Always Consult an Electrician: Due to the complexities of electrical grounding and bonding, especially when dealing with home electrical systems, always have a qualified, licensed electrician install and inspect any generator transfer switch setup. They can ensure your system is compliant with local codes and safe for your specific generator's configuration.
Understanding this feature ensures you respect the electrical design and seek professional help for fixed installations, keeping you and your property safe.
Maximizing Your Ryobi's Potential
Your Ryobi 6500W generator is a powerful and versatile piece of equipment. By taking the time to truly understand its operation, adhering to the safety guidelines, and committing to a consistent maintenance schedule, you'll not only extend its lifespan but also ensure it's ready to deliver reliable power whenever you need it most.
Whether you're battling a power outage, powering tools on a remote site, or enjoying outdoor events, knowing how to properly care for your Ryobi 6500W generator gives you peace of mind and empowers you to make the most of your investment. Keep your manual handy, follow these steps, and you’ll be well-prepared for any power challenge that comes your way.